de-nailed
When I demoed the bedroom next to the kitchen that I thought was going to become part of the kitchen.... wait. Did you follow that? Didn't think so. How about a visual aid.
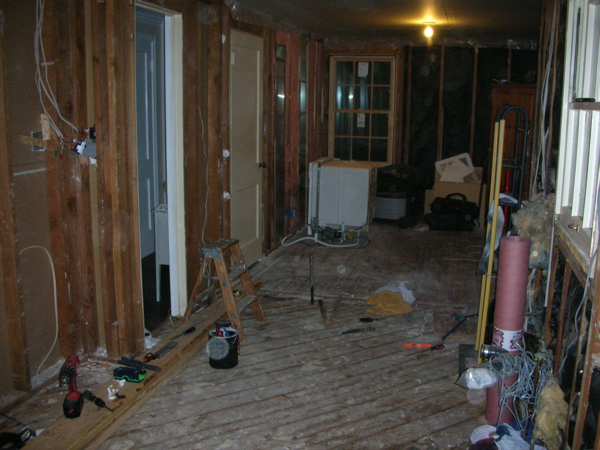
I know it's messy. Leave me alone, I was working! You're standing in the kitchen. See the towels in the middle of the floor? Those are shoved into a big hole so the cats didn't feel the need to jump down to the basement. Everything past that was the the old bedroom.
When I tore all this up I also pulled up the hardwood in the bedroom area. It would be replaced with whatever kitchen flooring I decided on, right? riiiiiigggghhhttt.
Besides, the elderly POs had installed a (leaky) washing machine in that room and a large section of the floor had deteriorated (hence the towel-plugged hole). I salvaged what I could with plans to use it in the nature room.
Well, the wall between the bedroom and kitchen was put back and the bedroom will remain a bedroom of some sort. Who knows what sort of flooring I'll want to put in there when the time comes. Since the nature room floor will be in direct contact with existing flooring in the dining room, seems like a good idea to use the salvaged stuff there as planned anyway.
In theory, it's Red Oak. Oh, wait, I have proof. See:

But who knows...because I also found a few of these.
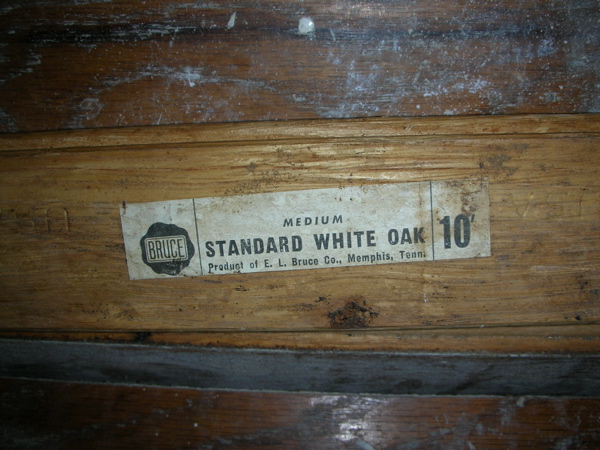
I'm a dummy and can't tell the difference based on the grain alone. Maybe some tags just got switched up. Maybe it's a mix. I'm not losing sleep over it.
Regardless, I didn't notice when it was installed in the bedroom. Hopefully I won't notice when it's installed in the nature room. Before I can re-use this flooring, I need to remove the nails. Wheeee!
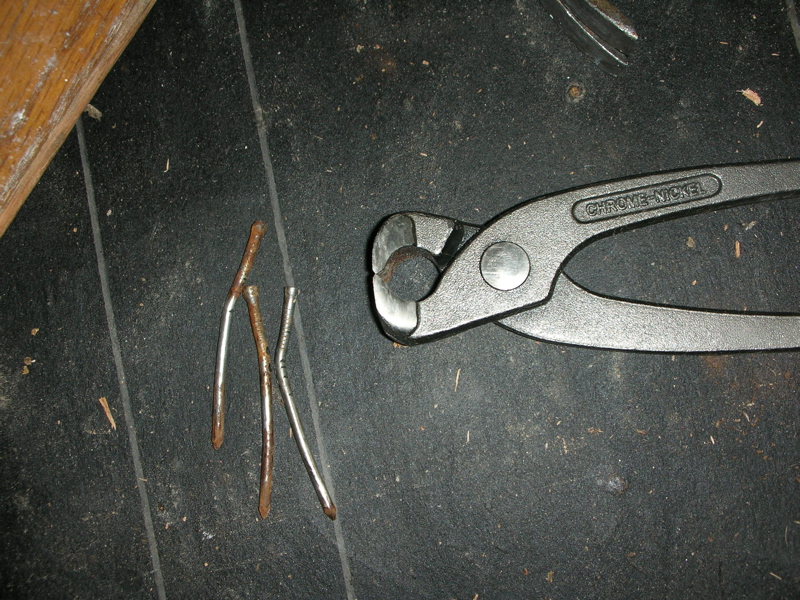
I don't remember who it was, but someone in houseblogger land gave me the idea to get a pair of these things for easy nail pulling. (Thanks unknown houseblogger!) They called them bull-nose pliers. I found no such thing at the store. The looks of these seemed to match that name the best so I picked them.
Technically, these are concrete nippers. And hoooo-boy, are they strong! You have to apply the correct balance of pull and pressure otherwise they'll bite right through the nail. Overall, they get the job done with fairly little effort. The key is to plan ahead so you only do a little bit of flooring at a time. Avoids those pesky blisters that way.
There is something oddly zenlike about this process. Stand on upside-down board with angled nails pointing towards you, clamp down close to wood, apply slight pressure and rock the face of the pliers towards you. And swooooop the nail is pulled through from the back. My extreme type-A-ness loooooves seeing visible progress on something that has a definitive end. Yes!
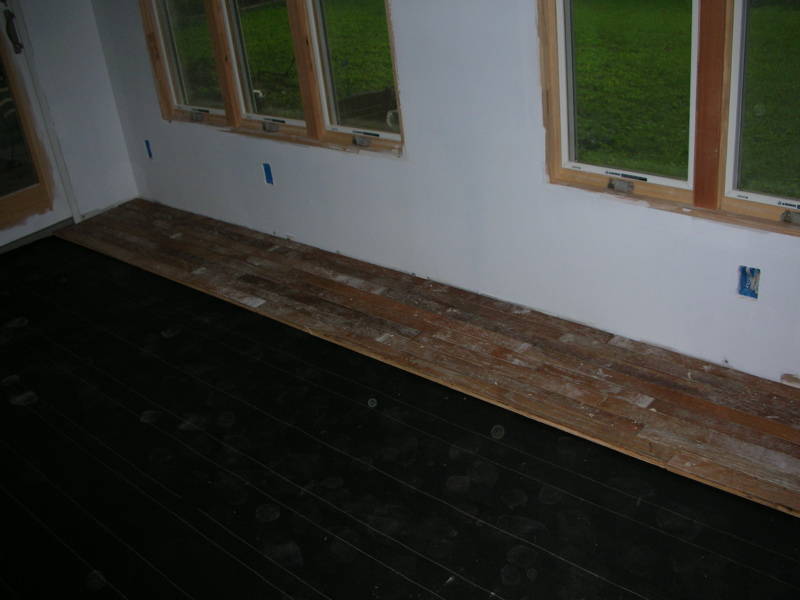
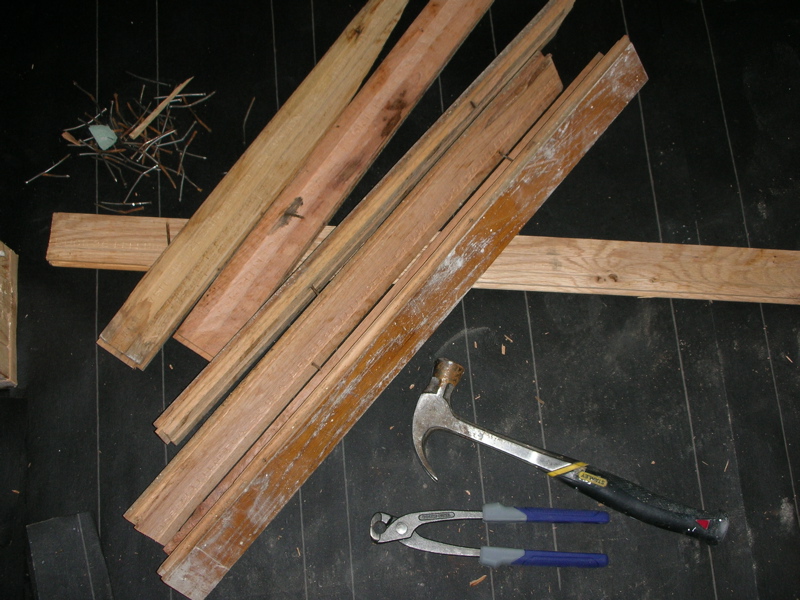
Here are the first of the de-nailed boards laid out. I know I don't have enough for the whole room. They'll be semi-dry-fitted which will help me estimate how much more I need to find. I'm much too lazy to calculate it based on the stacks in the basement.
Back to pulling nails....
I know it's messy. Leave me alone, I was working! You're standing in the kitchen. See the towels in the middle of the floor? Those are shoved into a big hole so the cats didn't feel the need to jump down to the basement. Everything past that was the the old bedroom.
When I tore all this up I also pulled up the hardwood in the bedroom area. It would be replaced with whatever kitchen flooring I decided on, right? riiiiiigggghhhttt.
Besides, the elderly POs had installed a (leaky) washing machine in that room and a large section of the floor had deteriorated (hence the towel-plugged hole). I salvaged what I could with plans to use it in the nature room.
Well, the wall between the bedroom and kitchen was put back and the bedroom will remain a bedroom of some sort. Who knows what sort of flooring I'll want to put in there when the time comes. Since the nature room floor will be in direct contact with existing flooring in the dining room, seems like a good idea to use the salvaged stuff there as planned anyway.
In theory, it's Red Oak. Oh, wait, I have proof. See:
But who knows...because I also found a few of these.
I'm a dummy and can't tell the difference based on the grain alone. Maybe some tags just got switched up. Maybe it's a mix. I'm not losing sleep over it.
Regardless, I didn't notice when it was installed in the bedroom. Hopefully I won't notice when it's installed in the nature room. Before I can re-use this flooring, I need to remove the nails. Wheeee!
I don't remember who it was, but someone in houseblogger land gave me the idea to get a pair of these things for easy nail pulling. (Thanks unknown houseblogger!) They called them bull-nose pliers. I found no such thing at the store. The looks of these seemed to match that name the best so I picked them.
Technically, these are concrete nippers. And hoooo-boy, are they strong! You have to apply the correct balance of pull and pressure otherwise they'll bite right through the nail. Overall, they get the job done with fairly little effort. The key is to plan ahead so you only do a little bit of flooring at a time. Avoids those pesky blisters that way.
There is something oddly zenlike about this process. Stand on upside-down board with angled nails pointing towards you, clamp down close to wood, apply slight pressure and rock the face of the pliers towards you. And swooooop the nail is pulled through from the back. My extreme type-A-ness loooooves seeing visible progress on something that has a definitive end. Yes!
Here are the first of the de-nailed boards laid out. I know I don't have enough for the whole room. They'll be semi-dry-fitted which will help me estimate how much more I need to find. I'm much too lazy to calculate it based on the stacks in the basement.
Back to pulling nails....
posted by SmilingJudy at
10:11 PM
![]()
![]()

2 Comments:
First post from a long time reader....just a quick 'thanks' for continuing the work on your blog....I enjoy reading it very much!
By Doris, at 11:30 PM
A belated happy Thanksgiving to you. Thanks for continuing your work on this enjoyable blog.
By Gerty, at 5:30 AM
Post a Comment
<< Home